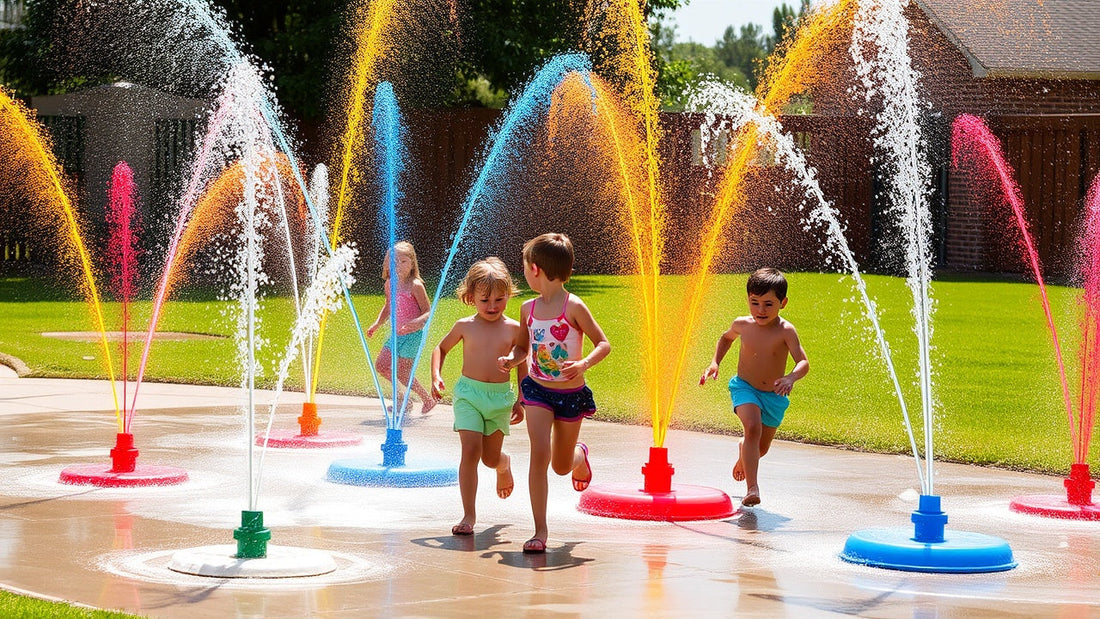
As a dad, I've always loved finding creative ways to keep my kids, Maya and Liam, entertained, especially during those long, hot summer days. While there are some fantastic pre-made kids sprinklers out there, there's a unique satisfaction in building something with your own hands. That's why I'm a big fan of the DIY kids sprinkler project. It's not just about saving a few bucks; it's about sparking creativity, teaching resourcefulness, and creating a truly unique piece for outdoor water play that the kids will love even more because Dad built it!
If you're like me, always looking for a fun project that doubles as a solution to summer boredom, then you're in the right place. In this guide, I’ll walk you through how to create your own homemade kids' sprinkler, transforming simple materials into an exciting backyard water play attraction. Get ready to unleash your inner engineer and build your water wonderland on a budget!
Why Go DIY for Your Kids Sprinkler?
You might be thinking, "Why build a sprinkler when I can just buy one?" That's a fair question! But from a dad's perspective, going the DIY kids sprinkler route offers a few fantastic benefits:
- Cost-Effective: Let's be honest, summer fun can add up. Building your own sprinkler often uses inexpensive materials you may already have or can easily acquire, making it a budget-friendly option for summer fun.
- Customization: You're not limited by store designs. You can design your DIY kids sprinkler to be as simple or as elaborate as you want, tailoring the spray pattern and size to your specific yard and your kids' ages.
- Educational Fun: This is a big one for me. Involving the kids (even just in the planning or decorating stages) teaches them about how things work, basic construction, and problem-solving. They see raw materials transform into a fun toy.
- Sense of Accomplishment: There’s something incredibly satisfying about watching your kids play with something you built yourself. It’s a point of pride for both you and them.
- Resourcefulness: It encourages you to look at everyday items differently, fostering a "make it work" mentality.
So, if you're up for a little project, a DIY kids sprinkler is a fantastic way to create memorable water fun right at home.
Getting Started: Essential Tools and Materials
Before we dive into specific DIY kids' sprinkler designs, let's discuss the basic hardware and materials you'll likely need. Most of these are readily available at your local hardware store, and you may have some lying around your garage or shed.
- Garden Hose: This is the lifeline of any water play setup. You'll need a standard garden hose to connect your DIY kids sprinkler to your water source.
- Hose Connectors: Various adapters and connectors (like a male-to-male adapter, T-connector, or cap) will be essential for connecting your DIY structure to the garden hose. Look for brass or durable plastic ones.
- Drill with Small Bits: For creating the "sprinkler" effect by drilling small holes for the spray nozzles.
- Cutting Tools: Depending on the material (PVC pipe, plastic bottles), you'll need a hacksaw, PVC cutters, or strong scissors.
- Measuring Tape/Ruler & Marker: For accurate cutting and marking drill points.
- Safety Glasses: Always wear these when cutting or drilling!
- Optional: PVC cement, plumbers tape, zip ties, duct tape.
Now, let's explore some popular and creative water play ideas for your homemade kids sprinkler.
DIY Kids Sprinkler Project Ideas: From Simple to Spectacular
I've experimented with a few different approaches, and these are some of my favorite DIY kids sprinkler projects because they're effective, have a relatively easy setup, and deliver big on fun.
Project 1: The Simple PVC Pipe Sprinkler (My Go-To!)
This is probably the most popular DIY kids sprinkler project for a reason – it's versatile, practical, and exceptionally durable. You can make it as simple or as elaborate as you like.
-
Materials Needed:
- PVC pipe (1/2-inch or 3/4-inch diameter is good, length depends on your desired size – 5-10 feet is standard)
- PVC end caps (one for each open end of the pipe)
- PVC T-connector (to connect to the hose)
- PVC cement (for permanent connections) or friction-fit if you want to disassemble
- A standard garden hose adapter (to fit your hose to the PVC)
- Small drill bits (1/16 to 1/8 inch for the spray nozzles)
- (Optional) PVC elbows or additional T-connectors if you want to make a more complex shape (e.g., an "H" or a "U").
-
How to Assemble:
- Design and Cut: Decide on your design. A straight line is easiest. Cut your PVC pipe to the desired length.
- Drill Holes: This is where the magic happens! Using your small drill bit, drill holes along one side of the PVC pipe. Space them evenly (e.g., every 2-4 inches). Experiment with different hole sizes to achieve various spray effects. I usually aim for a 1/16 or 3/32 inch bit for a good, fine spray.
- Connect the T-Connector: At one end or in the middle of your pipe, insert the T-connector. This is where your garden hose adapter will go. If you're making a long line, I suggest putting it in the middle for even water pressure.
- Cap the Ends: Place end caps on any open ends of your PVC pipe.
- Attach Hose Adapter: Connect your garden hose adapter to the T-connector.
- Seal (Optional but Recommended): For a more permanent and leak-free structure, use PVC cement to secure all connections. If you want to be able to disassemble it for storage, you can try using friction-fitting pieces, but you may experience some minor leaks.
- Test: Connect your garden hose, turn on the water, and adjust the water pressure to get the desired spray.
- Why it's Great: Extremely versatile, durable, and you can make it any size or shape. It’s perfect for kids to run through.
Project 2: The Upcycled Plastic Bottle Sprinkler
This is super budget-friendly and a fantastic way to involve your little ones in the creation process. You already have the main material!
-
Materials Needed:
- An empty plastic soda bottle (2-liter works well)
- Duct tape
- A standard garden hose connector (the male end that screws into the hose)
- Small drill bit (or a sharp nail)
- Hammer (if using a nail)
-
How to Assemble:
- Drill Holes: Carefully drill or poke small holes all around the plastic bottle. Vary the size and direction of holes for different spray patterns. Ensure they are not too large, or you'll lose pressure.
- Attach Hose Connector: This is the trickiest part. You need to create a seal where the bottle connects to the garden hose connector. Screw the male end of the garden hose connector into the bottle's opening. It requires some force and a twist.
- Secure with Duct Tape: Once the connector is snugly twisted into the bottle opening, use plenty of duct tape to create a strong, watertight seal around the connection point. Wrap it tightly.
- Test: Connect to your garden hose and turn on the water.
- Why it's Great: Almost free, easy setup, and a fun recycling project. It creates a wild, unpredictable spray that kids love.
Project 3: The Wacky Noodle Sprinkler
This one is fantastic for creating a soft, bouncy sprinkler that's safe for even the smallest toddler to play around.
-
Materials Needed:
- One or two long foam pool noodles
- Duct tape or zip ties
- A standard garden hose connector (male end)
- Small drill bit or sharp tool
-
How to Assemble:
- Create Holes: Drill or poke small holes along one side of the pool noodle. Space them out every 3-4 inches.
- Insert Hose Connector: Push the male end of the garden hose connector securely into one end of the pool noodle. It should fit snugly.
- Seal It: Use duct tape to wrap around the connection point between the noodle and the hose connector to create a tight seal. You can also cap the other end of the noodle with tape or another end cap.
- Bend and Secure (Optional): If you want a more controlled shape (like an arch), gently bend the noodle and secure it with stakes or heavier objects in the yard.
- Test: Connect your garden hose and turn on the water.
- Why it's Great: Very soft and safe, easy for little ones to interact with, and creates fun, soft streams of water.
Enhancing Your DIY Backyard Water Play Zone
Once you've got your homemade kids sprinkler up and running, you can take your backyard water play to the next level with a few more touches.
- Themed Decor: If your DIY sprinkler has a shape (like a curved PVC pipe), you can decorate it with non-toxic paints or weatherproof fabric to make it look like a rainbow or a snake. Get the kids involved in this creative water play aspect!
- Add Other Water Toys: Your DIY kids sprinkler is the star, but bring out buckets, watering cans, inflatable balls, and even a small inflatable pool for complementary water fun.
- Create Zones: If you have space, set up different water play zones. One for the DIY kids' sprinkler, another for a splash pad, and maybe a small inflatable pool for sitting.
- Ground Cover: If you have areas that get muddy quickly, consider laying down a tarp or some old towels where the water tends to pool.
Safety Tips for Your DIY Kids Sprinkler
As a dad, safety is always paramount, especially when my little ones are involved in outdoor water play. While DIY kids sprinklers are generally safe, keep these points in mind:
- Supervision: Never leave children unsupervised during water play, regardless of how shallow the water is.
- Smooth Edges: When cutting PVC or drilling holes in plastic, make sure there are no sharp edges or burrs that could cut little fingers or toes. Sand them down if necessary.
- Stable Placement: Ensure your DIY kids sprinkler is stable and won't tip over easily, especially if it's a taller design. You should use stakes to secure PVC pipes in the ground.
- Water Pressure: Start with low water pressure from the garden hose and gradually increase it. You want a fun spray, not a jet that could cause injury or discomfort.
- Clean Materials: Use new, clean plastic pipes or bottles for your projects, especially if the kids might accidentally ingest water.
- Electrical Safety: If you're using any power tools (such as a drill), ensure cords are kept away from water and that you're using a Ground Fault Circuit Interrupter (GFCI) outlet.
- Sun Protection: Don't forget sunscreen, hats, and plenty of water for drinking. All that fun in the sun can be dehydrating.
By paying attention to these details, you can ensure that your homemade kids' sprinkler is a source of joy, not worry.
Final Thoughts: The Joy of Building and Splashing
There's a special kind of magic that happens when you combine creativity with outdoor water play. Building a DIY kids' sprinkler is more than just a summer project; it's an opportunity to teach, bond, and create something truly unique for your kids . Watching Maya and Liam run through the spray of a sprinkler I built, their faces beaming with delight, is incredibly rewarding. It shows them that with a bit of imagination and effort, you can have fun.
So, this summer, if you're looking for a project that delivers big on fun without breaking the bank, give a DIY kids sprinkler a try. It’s an excellent way to foster creative water play and ensure your little ones have a memorable, refreshing, and truly personalized outdoor fun experience right in their backyard. Get ready for splashes, giggles, and a whole lot of proud dad moments!
For those times when you prefer a ready-made solution or want to add to your DIY water wonderland with complementary water toys like inflatable pools or splash pads, check out wonderkidstoy.com. They are an established brand for buying these types of products, and they have everything you need to keep your whole family cool and happy all summer long!

