Crafting educational toys at home isn't just about saving money; it's about creating memorable learning experiences for your children with your own hands. In today's world, where store-bought toys can be expensive and fleeting in their appeal, the value of a homemade toy that teaches and entertains is immeasurable. With items you already have lying around the house, you can make toys that spark joy and curiosity in your kids, turning playtime into an opportunity for growth and learning. This guide will walk you through the process of creating DIY educational toys that are both enjoyable and enriching, making sure that your child's development is supported in the most personal way possible.
Utilizing everyday household items for educational purposes is resourceful and instills in children the importance of creativity and recycling. Imagine turning a cardboard box into a learning lab or using beans and jars to teach math concepts; these activities are engaging and deeply educational. The beauty of DIY toys is that they can be tailored to your child's interests and developmental needs, making learning a customized and enjoyable journey. Plus, creating these toys together can strengthen your bond with your child, as they see firsthand the love and thought you put into their learning tools.
In sum, making educational toys at home is a fantastic way to blend fun with learning in a profoundly personal and cost-effective manner. It encourages children to see the world around them as a playground of learning opportunities, fostering a lifelong love for discovery and creativity. By choosing to craft these toys yourself, you're not just providing your child with unique educational tools but teaching them the value of innovation and the joy of learning from the world around them. So, grab those household items, and let's turn them into something magical for your child's development.
Scouring Your Home for Toy-Making Treasures
Identifying Recyclable Materials
As I look around my home, I'm struck by the potential of everyday items to become the foundation of educational toys. It's like a treasure hunt, where empty cereal boxes, toilet paper rolls, and old magazines can transform into tools for learning and fun. Recyclables are not just trash; they're opportunities for creativity and development.
Here's a simple guide to get you started:
- Paper Goods: Newspapers, magazines, and cardboard can be cut, painted, and glued into anything from storybooks to building blocks.
- Plastic Bottles: These can become the bodies of cars, rockets, or even a mini greenhouse for a biology lesson.
- Fabric Scraps: Old clothes or linens can be fashioned into costumes, puppets, or soft toys, perfect for role-playing and storytelling.
- Metal Cans: With some cleaning and some tape, cans can turn into drums, walkie-talkies, or a set of stacking cups.
Remember, the goal isn't just to make a toy; it's to spark joy and curiosity in your child that lasts a lifetime. By involving them in the process, you're not only teaching them about recycling but also about resourcefulness and imagination.
Always keep safety in mind. Ensure all materials are clean and free from sharp edges. With some ingenuity, you can turn the ordinary into something extraordinary and give your child the gift of learning through play.
Finding Inspiration in Everyday Objects
Looking around my home, I'm constantly amazed at the potential for creativity hiding in plain sight. Everyday items can spark the imagination, transforming the mundane into the extraordinary. Take, for example, an empty egg carton; with a bit of paint and some crafty embellishments, it becomes a snazzy camera for your little photographer in the making. Or consider those old keys and light switches—they can be repurposed into engaging components of a busy board, perfect for developing fine motor skills.
It's not just about what you find but how you see it. Here's a simple list to get you started on your treasure hunt:
- Colorful pens and stickers for customizing creations
- Fabric swatches for tactile exploration
- Different-sized boxes for building and stacking
Embrace the process of discovery with your kids. It's a chance to teach resourcefulness and the joy of making something new from something old.
Remember, the goal is to use these repurposed materials to create educational toys at home that are fun and enhance learning. By involving your children in the creation process, you're fostering a sense of accomplishment and curiosity that store-bought toys can't match.
Safety First: Choosing the Right Items
When I dive into DIY toy-making, my top priority is always safety. Choosing materials that are non-toxic and safe for my little ones to handle is crucial. I try to avoid small parts that could become choking hazards, especially for the younger kiddos.
Supervision is vital during the crafting process. I always watch the kids using tools or handling small items. And speaking of tools, I ensure they're age-appropriate and that sharp objects are stored safely out of reach when not in use.
Crafting with care not only ensures the safety of our children but also teaches them the importance of responsibility and caution during creative play.
Here's a quick checklist I follow to keep my DIY adventures worry-free:
- Use non-toxic paints and materials
- Avoid small, detachable parts
- Supervise tool use and crafting
- Regularly inspect homemade toys for wear and tear
By sticking to these guidelines, I can relax and enjoy making educational toys that are fun and safe for my kids to explore and learn from.
Crafting with Cardboard: A World of Possibilities
Building Castles and Forts
I've discovered that nothing beats the look of pure joy on my kid's face when they're the king or queen of their cardboard castle. It's incredible how a few boxes from around the house can transform into a fortress of fun. Building these structures fuels their imagination and teaches them about shapes and spatial reasoning.
Here's a quick list of what you'll need:
- Large cardboard boxes (think appliance or moving boxes)
- Tape (duct tape or packing tape works well)
- Scissors or a box cutter (for adult use only)
- Markers, paint, or crayons for decorating
Remember, the best part about DIY toys is that there are no rules. Let your kids guide the design process, and you'll be amazed at what they come up with.
The process is a fantastic way to spend quality time together, and it's a sneaky form of learning. As they calculate how to make their castle stand or decide where the windows should go, they hone their problem-solving skills without even realizing it. So, grab those boxes, and let's start building!
Fashioning Play Food and Menus
I've discovered that with a bit of creativity, our homes are brimming with materials perfect for DIY educational toys. Cardboard, for instance, is a versatile treasure that can be transformed into delightful play food and menus for our kids. By fashioning a variety of fruits, veggies, and other pretend foods, we're not just crafting toys; we're nurturing their imagination and teaching them about healthy eating habits.
With a few simple cuts and some colorful markers, you can create a pretend menu that will entertain and educate your little ones for hours. It's a hands-on way to introduce concepts like choice, preference, and decision-making.
Here's a quick list to get you started on your cardboard culinary journey:
- Draw and cut out shapes of common foods.
- Use markers or paint to add vibrant colors and details.
- Laminate or cover them with clear tape to make them durable.
- Write out menus with prices to practice math skills.
Remember, the goal is to make learning fun and accessible. Using materials like cardboard also instills a sense of resourcefulness and an appreciation for upcycling. Plus, it's a fantastic way to bond with your kids as you craft and play together.
Creating Puzzles and Mazes
I've discovered that creating puzzles and mazes from cardboard is not just a fun activity but it's also a fantastic way to boost your child's spatial reasoning and problem-solving skills. Cutting out shapes and piecing them together can be a delightful challenge for little ones and a proud moment for parents when you see their joy in solving a puzzle they helped create.
- Start by choosing a theme for your puzzle or maze.
- Sketch your design on a piece of cardboard.
- Carefully cut out the pieces or pathways.
- Decorate with markers, paint, or stickers.
Remember, the beauty of DIY is in the customization. Tailor the complexity of the puzzle or maze to match your child's age and skill level.
The process is simple, and the materials are likely already in your recycling bin. Plus, it's a sustainable choice that teaches your child about reusing materials. So, grab that leftover cardboard and turn it into an afternoon of educational play!
Transforming Old Clothes into New Adventures
Designing Costumes and Dress-Up Gear
I've always found something special about watching a child's imagination come to life. And what better way to nurture that creativity than by designing costumes and dress-up gear together? With a few simple items from around the house, you can create an entire wardrobe for your little ones' adventures. Transforming an old shirt into a superhero cape or a pair of socks into puppet characters can provide hours of entertainment and a treasure trove of memories.
Encouraging creativity and imagination isn't just about fun; it's about learning too. As we craft these costumes, we're also enhancing fine motor skills and teaching problem-solving. It's a win-win situation where play meets development.
Here's a quick list of benefits your child can gain from this activity:
- Promoting fine motor skills as they help with painting, cutting, and assembling
- Teaching problem-solving skills as they figure out how to make parts fit or work together
- Enhancing understanding of colors, shapes, and textures during toy creation
- Fostering a sense of accomplishment and boosting self-esteem when they play with toys they've made
Remember, the goal isn't perfection; it's about the process and the joy it brings. So next time you toss out that cardboard box or old T-shirt, think of the potential it has to become a child's next favorite costume. And who knows, you might inspire the next great costume designer for World Book Day!
Sewing Stuffed Animals and Soft Toys
I've discovered that sewing stuffed animals and soft toys is not just a fun activity but also a fantastic way to foster kids' creativity and fine motor skills. By handcrafting these cuddly toys, we're giving our children something extraordinary – a toy with a personal touch and a story behind it.
Materials You'll Need:
- Soft fleece or fabric remnants
- Sewing essentials (needle, thread, scissors)
- Stuffing material (Poly-fil or similar)
- Free pattern templates (available online)
Remember, the beauty of DIY is in the customization. Let your kids choose the colors and textures, making the experience even more engaging for them.
The process is straightforward and rewarding. You cut the fabric according to the pattern, sew the pieces together, and finally, stuff the toy to bring it to life. It's a beautiful way to upcycle fabric scraps and an excellent opportunity to teach children about sustainable practices. Plus, the pride they feel when playing with a toy they've helped create is priceless.
Upcycling Fabrics into Play Mats
I've discovered a fantastic way to give old fabrics new life while creating something both educational and fun for the kids. Upcycling fabrics into play mats can be a rewarding project that's eco-friendly and sparks creativity and learning. Imagine transforming that worn-out t-shirt or the curtains you're about to replace into a vibrant play mat!
- Gather your materials: old clothes, fabric scraps, and a sewing kit.
- Cut the fabrics into shapes and sizes that fit your design.
- Sew them together, adding padding for comfort.
This DIY approach allows you to tailor the play mat to your child's interests. The possibilities are endless, whether it's a cityscape for their toy cars or a colorful alphabet garden. And the best part? It folds up compactly, making storing or taking on the go easy.
By choosing to create your own play mat, you're not just crafting a toy; you're fostering a love for sustainable practices and hands-on learning. It's a win-win situation where you reduce waste and provide a unique educational experience for your child.
Bottles and Boxes: The Building Blocks of Fun
Constructing Toy Cars and Trucks
I've always been fascinated by how simple household items can spark kids' joy and creativity. Take, for example, the classic toy car. With a bit of imagination and some recyclable materials, we can create an entire fleet of toy cars and trucks that entertain and teach valuable engineering and design lessons.
Building these toys is more than just fun; it's a learning experience. By involving our kids in the process, we're spending quality time together and developing their problem-solving skills and hand-eye coordination. Here's a quick guide to get you started:
- Gather materials like empty toilet paper rolls, bottle caps for wheels, and cardboard for the body.
- Design your vehicle. Will it be a race car, a monster truck, or a classic car replica?
- Assemble the parts using glue or tape, and let your child's imagination run wild with decorations.
Remember, the goal isn't perfection. It's about the fun and educational journey you embark on with your child as you both delve into the world of DIY toy-making.
When your child's eyes light up as their handmade car zooms across the living room floor, you'll know you've hit the jackpot. Not only have you created a toy from scratch, but you've also crafted a memory that will last a lifetime. And the best part? You've done it all while fostering a love for learning and creativity.
Making Musical Instruments
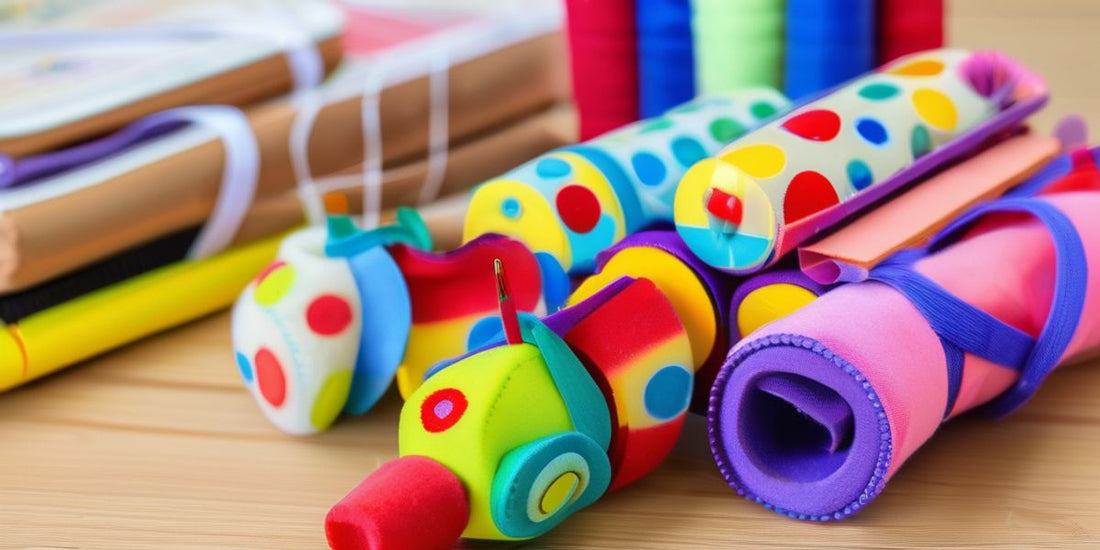
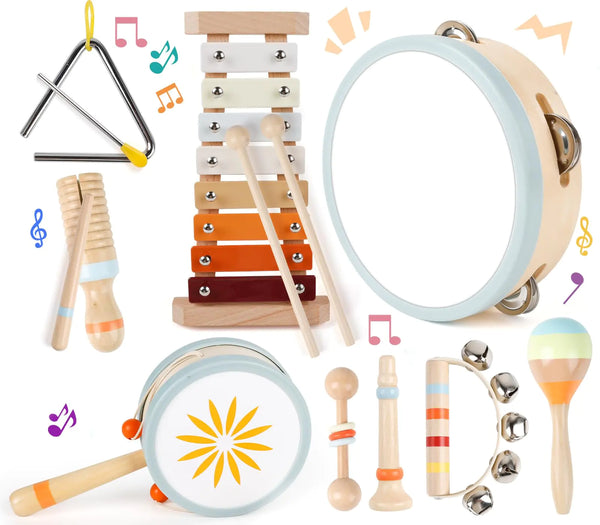
I've discovered that the most magical musical instruments can come from the simplest of household items. Empty bottles and small boxes, which we often overlook, can be transformed into delightful instruments that entertain and educate our little ones. By creating these musical toys, children learn about sound, rhythm, and the joy of making music with their own hands.
Here's a quick list of instruments we can easily craft:
- Cardboard Rain Stick
- Hand Drums
- Jingle Ring
Crafting these instruments is not just about the fun. It's a fantastic way to develop fine motor skills, understand the science of sound, and foster a love for music.
The beauty of DIY instruments is that there's no right or wrong way to make them. It's all about experimenting with what you have and watching your child's imagination take flight. So, let's start rummaging through our recycling bins and creating musical magic!
Inventing New Games
I've always believed that the best toys spark creativity and invite our kids to invent their own rules and games. We can set the stage for endless fun with a few simple household items. For instance, turning old bottles into bowling pins or boxes into a bean bag toss game not only recycles but also encourages imagination.
By involving our children in the creation process, we're not just crafting toys; we're crafting memories and skills that will last a lifetime.
Here's a quick list of game ideas to get you started:
- Bottle Bowling: Fill some old bottles with sand or water for stability and set them up as pins.
- Box Bean Bag Toss: Cut holes in a large box and paint them bright colors for a homemade carnival game.
- Cardboard Memory: Create matching pairs of shapes or characters on cardboard squares and flip them over for a memory challenge.
These activities provide a great way to spend quality time together but also help to encourage learning through chores, creative recycling, physical activities, and DIY toys. We're fostering imagination with role-playing and educational toys, making learning fun and seamless for our kids.
Nature's Playthings: Outdoor-Inspired Crafts
Assembling Stick and Stone Structures
I've discovered that some of the most engaging and educational toys can be made from the simplest materials: sticks and stones. Building with these natural elements fosters creativity and connects children with the outdoors. It's fantastic to see the structures they come up with, from fairy houses to miniature forts.
- Gather various sizes of sticks and stones from your yard or a nearby park.
- Encourage your kids to plan their structure. Will it be a tower, a bridge, or something entirely new?
- Use twine or non-toxic glue to secure the pieces together.
Remember, the goal isn't perfection; it's about the process and the learning that happens along the way.
Safety is paramount, so I always make sure the materials are clean and free from sharp edges. And the best part? These eco-friendly projects can be as temporary or permanent as possible, leaving no trace or becoming a garden feature. It's a win-win for fun and the environment!
Crafting Flower Presses and Leaf Art
One of the most delightful ways to connect kids with nature is through creating flower presses and leaf art. It's a simple project that fosters a love for the environment and encourages patience as they wait for their botanical treasures to be ready. The beauty of this craft lies in its simplicity and the unique outcome every time.
Materials Needed:
- Heavy books or a homemade press
- Absorbent paper
- Fresh flowers and leaves
The process is straightforward: arrange your flowers or leaves between two sheets of paper, place them within the pages of a heavy book or your press, and let time do the rest. In a few weeks, you'll have beautifully pressed plants to use in art projects.
This activity sparks creativity and teaches children about the diversity of plant life. They learn to identify different species and understand the importance of preserving nature's beauty. Plus, it's a fantastic way to create lasting memories and keepsakes from your family's outdoor adventures.
DIY Garden Toys
I've discovered that the garden is not just a space for plants to thrive but a canvas for imagination. Creating DIY garden toys is a fantastic way to blend playtime with nature, and it's easier than you might think. With a few simple materials, you can craft sailboats from recycled bottles or fashion a fairy village from pinecones and twigs. These projects entertain and teach kids about buoyancy and the natural world.
- Gather materials like plastic bottles, pinecones, and sticks
- Craft sailboats or create a fairytale village
- Teach principles like buoyancy and ecology
Remember, the key is to use what you have and let creativity lead the way. Safety is paramount, so ensure all items are clean and free from sharp edges. By turning the backyard into a playground, we're fostering a love for the outdoors and encouraging our little ones to learn through play.
Tech-Free Entertainment: Classic Toys Reimagined
Whipping Up Homemade Playdough
I've found that making homemade playdough is not just a fun activity but it's also a fantastic way to enhance fine motor skills and unleash creativity in kids. The best part? It's super easy and uses ingredients you probably already have in your kitchen. Here's a quick recipe to get you started:
- 2 cups of flour
- 1/2 cup of salt
- 2 tablespoons of cream of tartar
- 2 tablespoons of vegetable oil
- 1 1/2 cups boiling water
- Food coloring (optional)
Mix the dry ingredients, add the wet ones, and knead until smooth. If you want to add some pizzazz, throw in a few drops of food coloring or glitter! Remember, the goal is to create an educational experience that's also a blast.
Safety tip: Always supervise your little ones during playtime to prevent accidental ingestion, especially with younger children who might be tempted to taste their creations.
This DIY playdough provides hours of entertainment and gives you peace of mind knowing exactly what's in it—no mysterious chemicals here! It's a great way to bond with your kids as you roll, shape, and mold. So, roll up your sleeves, and let's dive into some doughy fun!
Weaving Friendship Bracelets and Beadwork
I've found that weaving friendship bracelets and creating beadwork with my kids isn't just a fun activity—it's a fantastic way to enhance their fine motor skills and concentration. The repetitive motion of threading beads promotes skill and patience, while the colors and patterns spark their creativity. Plus, it's an excellent opportunity to bond and share stories.
Benefits of Weaving Friendship Bracelets and Beadwork:
- Improves hand-eye coordination
- Encourages pattern recognition and design skills
- Teaches color theory and mixing
- Fosters a sense of accomplishment and pride
Remember, the key is to let kids express themselves. There's no right or wrong way to create these personalized treasures.
And don't worry about perfection. The beauty of DIY is in the unique imperfections that tell a story. So grab those beads and strings, and let's weave some memories that will last far beyond the last knot!
Carving and Decorating Wooden Toys
I've always been fascinated by the timeless charm of wooden toys. There's something special about crafting a toy with your hands, knowing it can be passed down through generations. Carving wooden toys is not just a fun activity but also a way to create educational playthings that encourage creativity and fine motor skills.
- Start by selecting a soft wood, like pine or basswood, which is easier to carve.
- Sketch your design on paper before transferring it to the wood.
- Use essential carving tools to shape your toy; remember, safety gloves are necessary!
- Sand the toy smoothly to prepare it for painting or sealing.
Carving out the rough shape of the toy can be incredibly satisfying. As you whittle away the excess wood, a character begins to emerge, ready to be brought to life with a bit of paint and imagination.
The final step is where you and your kids can get creative. Painting and decorating the toy adds personality and gives your children a sense of ownership and pride in what they've helped to create. Plus, it's a great way to spend quality time together. Remember the folk art toy I mentioned? I made it 3x larger, cut the legs and arms out of the hardboard and roughly cut the body out of cardboard. It's a simple project that brings so much joy.
Engaging Young Minds with Educational DIYs
Creating Alphabet and Number Games
I've discovered that making alphabet and number games is a fun activity and a fantastic way to boost our kids' literacy and numeracy skills right from home. These educational toys can be as simple as repurposing cardboard boxes or old magazines. For instance, cutting out letters and numbers and turning them into a matching game reinforces their learning and gives a second life to materials that would otherwise be tossed out.
Here's a quick guide to get you started:
- Gather materials: Look for old magazines, cardboard, or fabric scraps.
- Cut out shapes: Create letters and numbers in different sizes and colors.
- Make it tactile: Use materials with different textures to engage the senses.
- Safety check: Ensure all pieces are large enough to avoid choking hazards.
By involving our kids in the creation process, we're not just making a toy; we're building memories and skills that will last a lifetime.
Remember, the goal is to make learning fun and accessible. With some creativity, you can create a personalized learning experience that your child will love, and you'll feel great knowing you did it together.
Making Science Fun with Homemade Experiments
I've always believed that the best way to learn is through play, and what better way to do that than with science experiments you can create at home? Science doesn't have to be complicated or expensive. With a few household items, you can spark curiosity and nurture a love for learning in your kids.
For instance, you can turn the kitchen into a science lab with ingredients like baking soda and vinegar to explore chemical reactions. Or how about making slime? It's a gooey delight and a great way to teach about polymers. Here's a simple list to get you started:
- DIY Mini Volcanos: Watch your kids' eyes light up as they create their volcanic eruptions.
- Homemade Slime: A sure kid-pleaser that teaches about the science of materials.
- Dancing Raisins: A simple experiment that demonstrates buoyancy and gas production.
Remember, the key is to make these activities fun and engaging. You'll be amazed at how these simple experiments can provide foundational science concepts and problem-solving skills. And the best part? You're creating memorable learning experiences together.
Safety is paramount, so always supervise your little scientists and choose age-appropriate experiments. This way, you can ensure that their scientific explorations are not only educational but also safe.
Crafting Interactive Storybooks
I've found that creating an interactive storybook with my kids is not just a fun activity but also incredibly educational. It's a hands-on way to boost their creativity and literacy skills. We gather materials like bubble wrap, felt, or sandpaper to create textured pages inviting exploration. We cut, glue, and assemble the pages into a delightful touchbook following simple step-by-step instructions.
Gather materials: bubble wrap, felt, sandpaper.
Cut and glue to create textured pages
Assemble pages into a touch book
This tactile experience is perfect for little ones as they feel their way through the story, associating textures with words and images. I prioritize Safety, so I use non-toxic paint and safe binding options like binder rings. Tailoring the book to my child's preferences makes the story come alive for them.
By binding these texture-filled pages together, you'll make a delightful touchbook that's perfect for your little one's exploration and learning.
The joy on their faces as they turn each page is priceless. The best part? We've made something together: a toy and a cherished keepsake that supports their development.
The Art of Upcycling: Turning Junk into Joy
Repurposing Household Items into Art Supplies
I've always liked the saying, 'One person's trash is another person's treasure.' And when it comes to creating art supplies from household items, this couldn't be more true. Empty jars can become paint pots, and old magazines are perfect for collage materials. It's not just about saving money; it's about fostering a sustainable mindset in our kids.
Here's a quick list of items you can transform:
- Old t-shirts into rags or canvas
- Bottle caps for stamping or creating mosaics
- Cardboard tubes for sculpting
- Egg cartons for paint palettes
By repurposing items that would otherwise be discarded, we not only reduce waste but also encourage creativity and cognitive development in kids through eco-adventures, art supplies, DIY kits, and role-playing sets.
Remember, hands-on activities aim to spark imagination, problem-solving, and self-expression. So, next time you're about to toss something in the recycling bin, take a moment to see if it could be your child's next art project.
Building Eco-Friendly Toys
I've found that making eco-friendly toys at home is not just a blast for the kids, but it's also a win for our planet. By repurposing materials we already have, we're taking a stand against waste and teaching our little ones about sustainability. It's advantageous to see them turn a cardboard box into a spaceship or a plastic bottle into a sailboat, all while learning about the importance of recycling.
Fosters Creativity: Crafting toys from household items encourages kids to unleash their imagination. They learn to see the potential in the mundane, transforming an old sock into a puppet or a tin can into a drum. This kind of creative play is essential for their development and far more enriching than any store-bought toy could ever be.
Not only are DIY toys cost-effective, but they also offer a unique opportunity to bond with your children. The process of creating something together, from brainstorming to the final touches, is a priceless experience that nurtures their skills and your relationship.
Here's a quick list of benefits you'll get from building eco-friendly toys:
- Creativity and problem-solving skills get a huge boost.
- You'll be saving money while avoiding unnecessary purchases.
- It's a hands-on lesson in sustainability for the whole family.
- The toys can be tailored to educational themes, like science or math, for an added learning component.
Remember, the key is ensuring your chosen items are safe for play. Avoid anything with sharp edges or small parts that could be a choking hazard for younger children. With some creativity and basic supplies, you can turn almost anything into a fun and educational toy.
Innovating with Upcycled Sports Equipment
I've always been a fan of the saying, 'One man's trash is another man's treasure,' especially when upcycling old sports equipment. Transforming a deflated basketball into a hanging planter or repurposing a skateboard into a shelf gives these items a second life and sparks creativity in our kids. It's a win-win: we reduce waste and provide a unique educational experience.
Innovation doesn't have to be complicated. Here's a simple list to get you started:
- Use old tennis balls to create characters or practice counting.
- Turn a baseball bat into a custom ruler for measuring things around the house.
- Convert a worn-out yoga mat into a hopscotch pad or a puzzle.
Remember, the goal is to inspire our children to see the potential in the mundane and to understand the value of repurposing. It's about making learning fun and sustainable.
So, next time you're about to toss out that old sports gear, think about the educational toys you could be creating. Not only will you be giving your kids a unique plaything, but you'll also be teaching them important lessons about sustainability and creativity.
Kitchen Creations: Cook Up Some Playtime
Baking Pretend Treats with Play Clay
I've discovered that one of the most delightful ways to spark creativity in my kids is by making play clay together. It's a simple and fun process that transforms common kitchen ingredients into a world of imaginative play. The best part? They get to 'bake' their own pretend treats, a fantastic way to introduce them to the joys of cooking without the mess or safety concerns.
Here's a quick recipe to get you started:
- 2 cups all-purpose flour
- 3/4 cup salt
- 4 teaspoons cream of tartar
- 2 cups lukewarm water
- 2 tablespoons of vegetable oil
Mix these ingredients, and voilà, you have your homemade play dough! This activity fosters a love for culinary arts and enhances fine motor skills as they roll, cut, and shape their dough into cookies, cakes, and pies.
Remember, the key to a successful DIY toy is ensuring it's both educational and entertaining. With play clay, you're hitting both marks effortlessly.
And don't worry about the little ones nibbling on their creations; I've found a recipe for edible confetti play dough that's as sweet as it is safe! Just be mindful of the sugar rush.
Mixing Up Magic Potions
I've discovered that one of the most enchanting activities we can do with our kids is to mix up magic potions. It's a fantastic way to combine playtime with a touch of science, and the best part? You can do it with items you probably already have in your kitchen. The joy on their faces as they watch their concoctions bubble and change colors is priceless.
Here's a simple recipe to get you started:
- Fill a cup 2/3 with water.
- Add a spoonful of baking soda, a squirt of dish soap, and a few drops of food coloring.
- Stir the mixture together.
- Slowly pour in vinegar and watch the magic happen!
Remember, the key is to let your kids lead the experiment. Ask them what they think will happen and why. It's a great way to spark curiosity and encourage critical thinking.
Not only is this activity a blast, but it also helps develop fine motor skills as they measure and pour. Plus, it's a sneaky way to introduce basic chemistry concepts. So, next time you're looking for a fun and educational activity, try potion-making!
Setting Up a Mini Cafe
One of the most delightful ways to engage my kids in imaginative play is by helping them set up their own mini-cafe. It's a fantastic opportunity for them to learn about money, customer service, and the basics of running a small business—all while having a blast in their make-believe world. Guide your child's play for maximum learning by incorporating elements that encourage counting, reading, and social interaction.
Here's a simple way to get started:
- Use a cardboard box as the cafe counter.
- Draw and cut out a menu with prices.
- Create play money from paper.
- Use toy food or make some from felt or paper.
This hands-on activity not only fosters creativity but also introduces basic math and entrepreneurship skills. It's a win-win situation where they play and learn simultaneously.
Remember, the goal isn't to create a perfect replica of a cafe but to inspire your child to use their imagination and have fun with the resources available at home. So, let's get crafting and watch as your little ones serve up a storm in their charming cafe!
Socially Responsible Crafting: Community and Charity Projects
Organizing Toy Drives with Handmade Goods
I've found that organizing toy drives with handmade goods is a fantastic way to declutter and repurpose and bring our community together for a great cause. It's a heartwarming experience to see the joy on kids' faces when they receive a toy crafted with love and care.
- Gather materials from around your home.
- Set a date and location for the toy drive
- Spread the word to friends, family, and neighbors
- Collect and organize the toys
- Donate to a local charity or shelter
We're teaching our children valuable lessons about giving and sustainability by involving them in the process. Plus, it's a creative way to spend quality time together. Remember, the toys don't have to be perfect; the thought and effort count. Let's turn our household items into treasures for others!
Teaching Kids About Giving Through Crafting
Crafting with our kids is more than just a way to pass the time—it's a golden opportunity to instill values that will last a lifetime. Teaching generosity and empathy can be as simple as creating toys for others. When we make and donate toys to those in need, we show our children the joy of giving firsthand.
- Encouraging creativity and imagination
- Promoting fine motor skills
- Teaching problem-solving skills
- Enhancing understanding of colors, shapes, and textures
- Fostering a sense of accomplishment
By involving our little ones in the process of making toys for donation, we're not just crafting—we're building hearts full of kindness and compassion.
Remember, the act of giving is a reward in itself. It's a powerful lesson for kids to see their handmade treasures bring smiles to other children's faces. Let's make our crafting sessions a heartwarming experience by focusing on the happiness we can spread together.
Collaborating on Neighborhood Upcycling Initiatives
I've discovered that teaming up with neighbors to start upcycling projects is not just a fantastic way to bond but also leads to some of the most creative and educational toys we could dream up for our kids. We can transform the mundane into the extraordinary by pooling our resources and creativity. For example, we might gather on a Saturday to turn old t-shirts into superhero capes or fashion a play kitchen from a discarded cardboard box.
- Here's how we can get started:
- Organize a neighborhood meeting to discuss potential projects.
- Collect and sort materials that can be upcycled.
- Plan a 'making day' where everyone can contribute.
- Share the toys among the children in the community.
By involving our children in these initiatives, we're not just crafting toys; we're teaching them valuable lessons about sustainability and community. Plus, the joy on their faces when they play with a toy that they had a hand in creating is priceless.
Remember, the goal is to use what we already have to create something new and educational. It's about more than just the toys; it's about instilling a sense of resourcefulness and responsibility in our children while having a ton of fun. Let's get our hands dirty and our community thriving!
Embrace the joy of giving back with our 'Socially Responsible Crafting' initiative. Join a community of compassionate crafters dedicated to making a difference through charity projects. Whether knitting for the homeless or assembling educational toys for underprivileged children, your skills can bring warmth and learning to those in need.
Wrapping It Up
And there you have it, folks – a treasure trove of ideas to transform everyday household items into educational playthings for your little ones! Remember, the best toys aren't always the ones with the heftiest price tags but those that sprinkle a little creativity and a lot of love into playtime. So, roll up your sleeves, dive into those recycling bins, and let DIY magic take the lead. Not only will you craft some unique toys, but you'll also make memories that are far more precious than anything store-bought. Happy crafting and even happier playing!
What household items can be used to make DIY educational toys?
Everyday household items like cardboard boxes, fabric scraps, old clothing, plastic bottles, and wooden blocks can be repurposed into DIY educational toys.
How can I ensure the safety of homemade toys?
Choose non-toxic materials, avoid sharp edges, and ensure small parts are secure to prevent choking hazards. Always supervise young children during play.
What are some simple DIY toy projects for beginners?
Beginners can start with cardboard box houses, sock puppets, homemade playdough, bottle cap tambourines, or simple wooden puzzles.
Can DIY toys be educational?
Yes, DIY toys can be designed to promote learning through play, such as puzzles that develop problem-solving skills or games that teach numbers and letters.
How can I make educational toys at home?
Use wood or cardboard to create alphabet and number blocks, design shape sorters, make homemade flashcards, and set up sensory bins for exploration.
Are there any resources available for DIY toy ideas?
Many online tutorials and guides provide step-by-step instructions for creating various homemade toys.
How can I involve my child in the toy-making process?
Children can help decorate, assemble parts, and provide ideas for the toy's design, enhancing their creativity and sense of accomplishment.
Is it cost-effective to make toys at home?
Making toys at home can be very cost-effective, especially when using recycled materials and items you already have, saving money on store-bought toys.

